For the wedding, I wanted make my groomsmen something functional that also looks nice. Since we all enjoy a good brew, I made constructed some wall mounted bottle openers from granadillo and patagonia rosewood (leftover from the ukulele stand). I thought the colors contrasted well but weren't too overwhelming. The stock was already S4S so I didn't have to do any milling which is great since I haven't yet bought a jointer. I did start by planing the boards all to the same thickness though.
 |
| Thickness planer makes a mess without a vacuum. |
 |
| Glue time. |
After gluing them up I sent them through the planer once more to even up the faces. I then cut the three planks out of the boards and cut the ends square. This gave me my final size for all of them.
 |
| Cross cut sled came in handy. |
 |
| All three planks sized. |
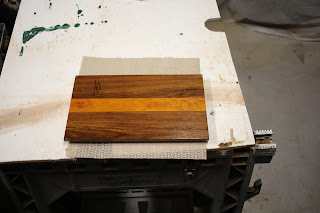
I wanted to personalize each one for the guys but I don't have a letter templating kit for the router. I asked the kind folks at Woodcraft and they directed me to a couple that does laser engraving at their home near the 7 Mile Fair. It was a bit of a drive but the results were great and didn't cost all that much. Before engraving, I had to apply a coat of urethane to protect the wood surrounding the engraving area. I'm glad I did because they showed me examples of boards they had lasered without a finish and the wood around the area is charred and has a strange film on it that would be difficult to sand off without affecting the engraving.
 |
| One coat of urethane. |
 |
| Engraved and routed. |
After engraving, I used a cove bit on the router to dress up the edges a bit and then applied three more coats of urethane. The finish really brings out the colors of the woods and should hold up to quite a bit of abuse. If it does end up getting scratched I can just sand it a bit and apply a few more coats of urethane.
 |
| Several urethane coats. |
Next was to work on the backs. I wanted these to mount flush to the wall and to catch the bottle caps when opening a tasty beverage. This meant I had to route out some slots for the mounting brackets and a magnet. I used
key hole hangers for the mounting hardware and a
1-1/2" diameter neodymium magnet for the catch.
 |
| Burned my stamp in the back. |
 |
| Testing router setup. |
 |
| Marked the tape for start and stop points. |
 |
| Key hole hardware fitted. |
 |
| Hardware installed. |
 |
| Magnet installed with Forstner bit. |
The last step was to attache the actual
opener bracket on the fronts. I made sure to arrange the back hardware screws to not interfere with the mounting screws for the opener.
 |
| All three finished. |
 |
| Close up. |
The end results looks really nice and the urethane provides a glossy, smooth finish that should hold up to years of abuse. I attached the magnets with epoxy which I haven't worked with before but I don't expect any problems with it. All the guys really seemed to like the gifts and I had a lot of fun making them.


No comments:
Post a Comment